페이지 만들기
1. index.css 만들기
body {
margin: 0;
font-family: -apple-system, BlinkMacSystemFont, "Segoe UI", "Roboto", "Oxygen",
"Ubuntu", "Cantarell", "Fira Sans", "Droid Sans", "Helvetica Neue",
sans-serif;
-webkit-font-smoothing: antialiased;
-moz-osx-font-smoothing: grayscale;
font-size: 20px;
}
ol,
ul {
margin: 0;
padding: 0;
list-style: none;
}
code {
font-family: source-code-pro, Menlo, Monaco, Consolas, "Courier New",
monospace;
}
a {
text-decoration: none;
color: #333;
}
.App {
width: 800px;
margin: 0 auto;
}
.header {
position: relative;
}
.header .menu {
position: absolute;
top: 10px;
right: 0;
}
.header .link {
border: 1px solid #333;
padding: 10px;
margin-left: 10px;
background-color: #efefef;
font-weight: bold;
border-radius: 4px;
}
.list_day {
display: flex;
flex-wrap: wrap;
}
.list_day li {
flex: 20% 0 0;
box-sizing: border-box;
padding: 10px;
}
.list_day a {
display: block;
padding: 20px 0;
font-weight: bold;
color: #fff;
text-align: center;
border-radius: 10px;
background-color: dodgerblue;
}
table {
border-collapse: collapse;
width: 100%;
}
table td {
width: 25%;
height: 70px;
border: 1px solid #ccc;
text-align: center;
font-size: 26px;
}
table td:first-child {
width: 10%;
}
.off td {
background: #eee;
color: #ccc;
}
.btn_del {
margin-left: 10px;
color: #fff;
background-color: firebrick;
}
button {
padding: 10px;
font-weight: bold;
font-size: 18px;
cursor: pointer;
border: 0 none;
border-radius: 6px;
padding: 10px 20px;
color: #fff;
background-color: dodgerblue;
}
.input_area {
margin-bottom: 10px;
}
.input_area label {
display: block;
margin-bottom: 10px;
}
.input_area input {
width: 400px;
height: 40px;
font-size: 20px;
padding: 0 10px;
}
.input_area select {
width: 400px;
height: 40px;
font-size: 20px;
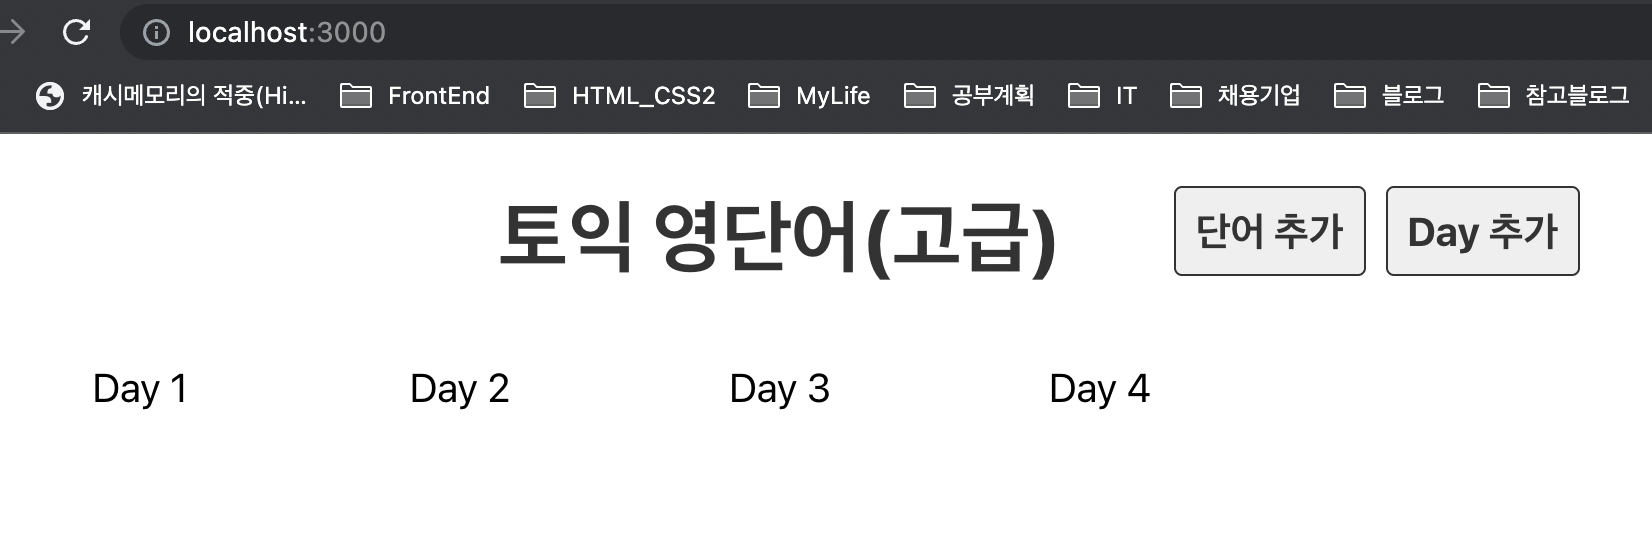
}2. Header 컴포넌트 만들기 (로고와 메뉴들) Header.js
export default function Header(){
    return <div className="header">
        <h1>
            <a>토익 영단어(고급)</a>
        </h1>
        <div className="menu">
            <a href="#" className="link">단어 추가</a>
            <a href="#" className="link">Day 추가</a>
        </div>
    </div>;
}
3. App component에서 위에 만든 Header 컴포넌트를 사용 App.js
import './App.css';
import Header from './component/Header';
function App() {
return (
// className : class는 자바스크립트 예약어이기 때문에
<div className="App">
<Header/>
</div>
);
}
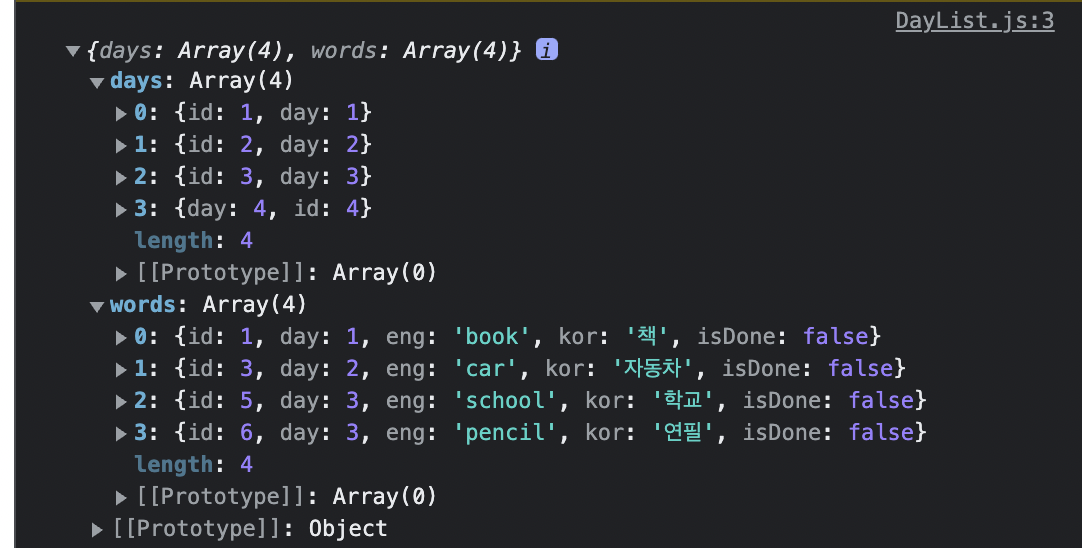
export default App;4. 더미데이터 만들어 사용하기 위해 db 폴더 만들어서 data.json 파일 하나 만들기
{
"days":[
{"id":1,"day":1},
{"id":2,"day":2},
{"id":3,"day":3}
],
"words":[
{
"id":1,
"day":1,
"eng":"book",
"kor":"책",
"isDone":false
},
{
"id":3,
"day":2,
"eng":"car",
"kor":"자동차",
"isDone":false
},
{
"id":5,
"day":3,
"eng":"school",
"kor":"학교",
"isDone":false
},
{
"id":6,
"day":3,
"eng":"pencil",
"kor":"연필",
"isDone":false
}
]
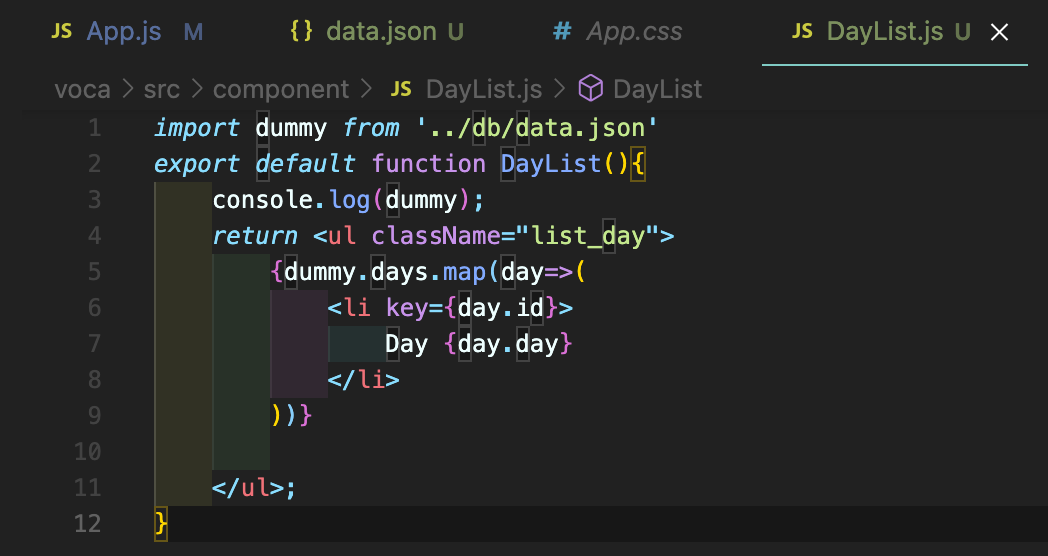
}5. DayList 컴포넌트 만들기
-1 더미데이터 불러오기 import dummy from '../db/data.json'
-2. map 반복문 이용 key 필요
(https://www.youtube.com/watchv=ghxHAy3LH28&ab_channel=%EC%BD%94%EB%94%A9%EC%95%99%EB%A7%88)
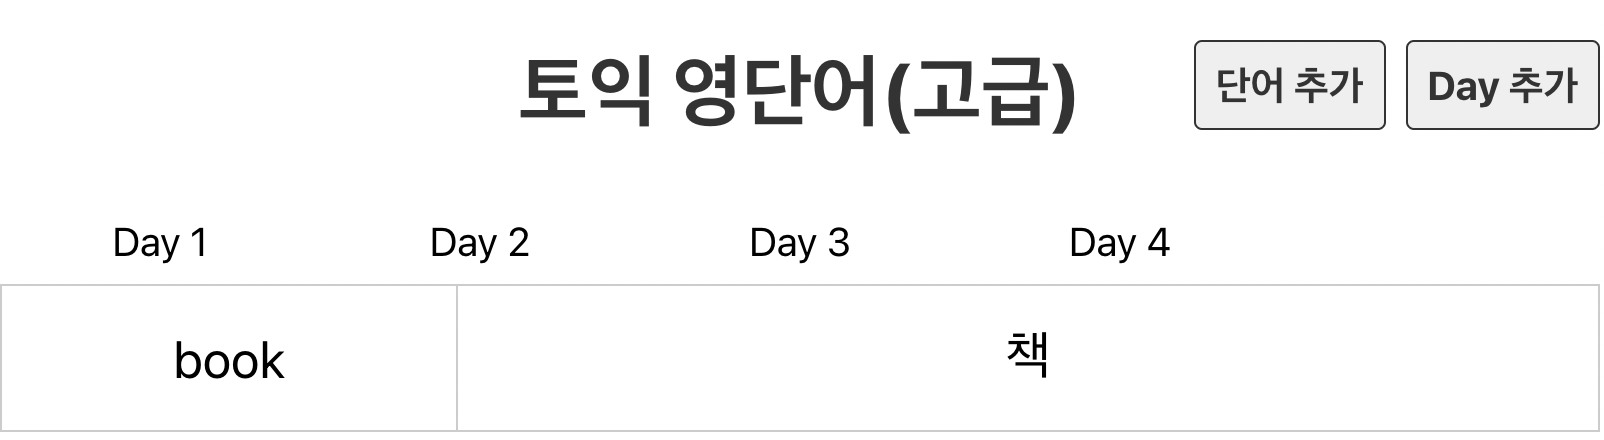
6. Day 컴포넌트 만들기 (특정 날짜를 클릭하였을 때 단어가 나오도록)
-1. 우선 날짜 값에 따라(아직 날짜를 주기 전) 단어가 나오도록
ex) day=1 filter로 1인것만 list로 저장하여 map으로 반복문 돌기
import dummy from '../db/data.json';

export default function Day(){
    const day=1;
    const wordList=dummy.words.filter(word=>(
        word.day === day
    ));
    //dummy.word 이용할 것이다.
    return (
    <>
        <table>
            <tbody>
                {wordList.map(word=>(
                    <tr key={word.id}>
                        <td>
                            {word.eng}
                        </td>
                        <td>
                            {word.kor}
                        </td>
                    </tr>
                ))}
            </tbody>

        </table>
    </>
    );
}
'WEB(Front-End) > React 시작' 카테고리의 다른 글
| 10. event handling 뜻 보기, 숨기기체크박스 만들기 (0) | 2021.11.02 |
|---|---|
| 9. react-router-dom 를 이용하여 페이지 이동 (0) | 2021.11.02 |
| 7. props (0) | 2021.11.02 |
| 6. state(컴포넌트 속성값) (0) | 2021.11.02 |
| 5. 이벤트 처리(Handling Events) (0) | 2021.11.02 |


